How to create CD label using Photoshop
Introduction
This tutorial teaches you how to use Adobe Photoshop to create a CD or DVD label for your compact disc copying project.
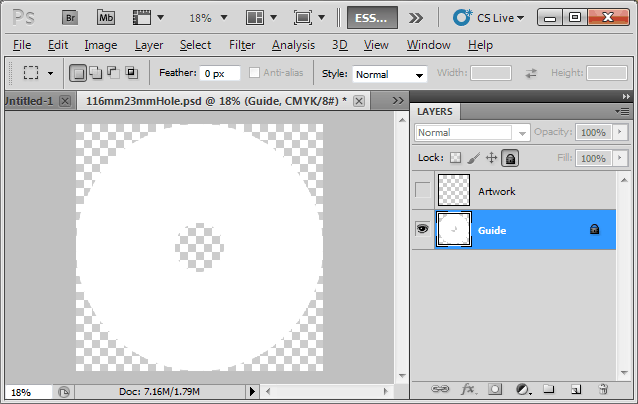
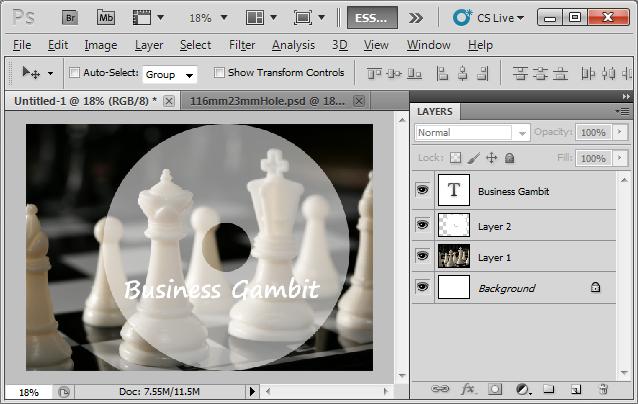
The purpose of this tutorial is to transform a square (or rectangular) picture into a circle with the middle hole as shown below.
| Convert rectangular picture | to | circle CD label |
|
|


Picture Size
It deserves a little bit math here before we continue. In Photoshop editing there are two numbers of interest, i.e picture resolution and number of pixels. To have a good print, compact disc replicators normally require the artwork to have at least 300 DPI. What this means is that the density of dots that make up the picture will have 300 dots per inch. If you measure a compact disc you will find that the diameter is 120mm, and the artwork is normally 2mm away from the CD edge. Hence the diameter of the label should be 116mm. Because of the mixing of metric and imperial systems here we will need to do some conversion to get the proper number of pixels for our label artwork.
- Since 1 inch has 25.4mm, so the diameter of the label in inch will be 116 ÷ 25.4 = 4.567 inch.
- Since we require 1 inch to have 300 pixels, so the number of pixels for 4.567 inches will be 300 x 4.567 = 1370 pixels.
We will use this magic number 1370 pixels later in the tutorial.
Step 1: Look for the background picture
There are plenty of resources where you can find pictures of interest. Google image is your best portal because it's free. gettyimages® also provide royalty free photos. Try to find pictures that has the smaller of the width and height larger than 1370 pixels so you won't have to enlarge the picture. Enlarging picture will make the picture blurry because the extra pixels need to be created by approximation.
Step 2: Open the picture in Photoshop
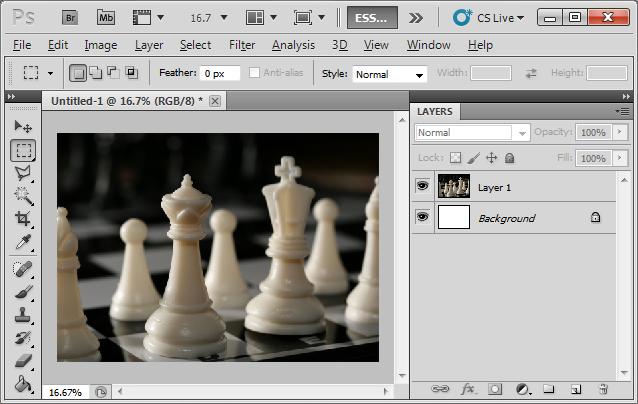
Step 3: Resize the picture
Resize the picture so that the smaller of the width and height equals to 1370.

Step 4: Download and open the artwork template
Download the CD label artwork template from your CD replication service provider and open it in Photoshop.
Step 5: Copy and paste the template over the background picture
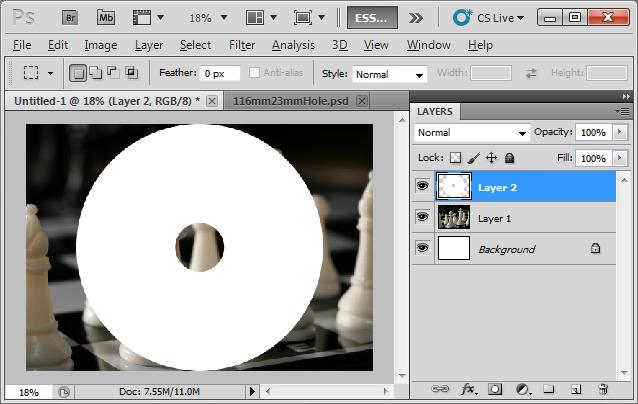
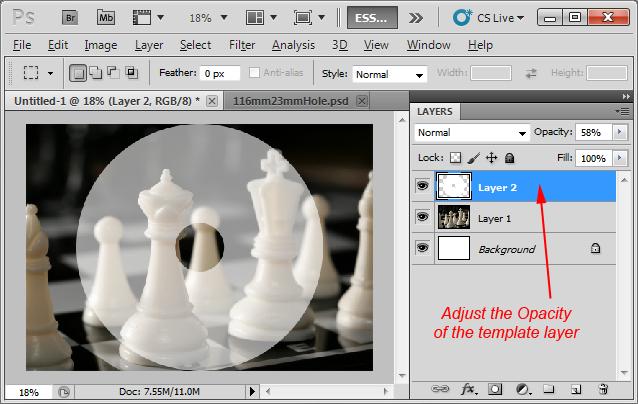
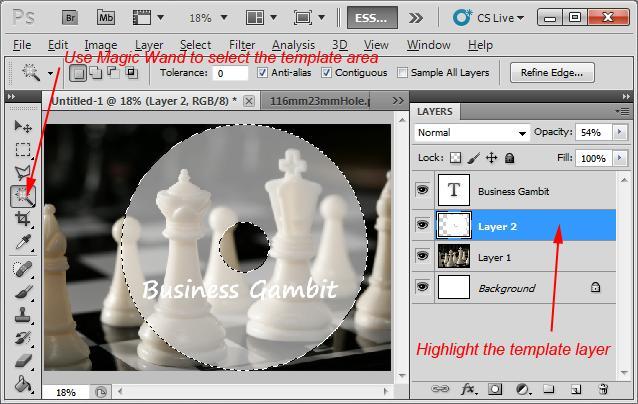
Step 6: Adjust the Opacity of template layer
Highlight the template layer and adjust its Opacity making it semi-transparent. Doing so will allow you to see through the template to reveal the background picture and the template becomes a guide for you to see where the other assets be put.
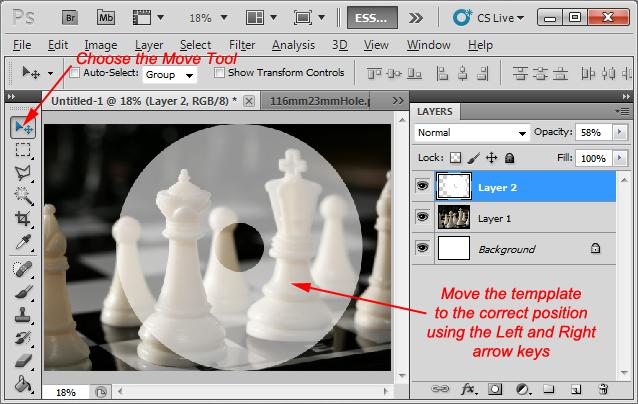
Step 7: Move the template to right position
Choose the [Move Tool] from the [Tools] palette and with the template layer highlighted, you can use the [Left] and [Right] arrow keys to move the template to position you want.
Step 8: Type in the necessary text
with the semi-transparent template as a guide, type in the necessary text so that it won't be outside of template boundary and won't fall into the center non-printable hub area.
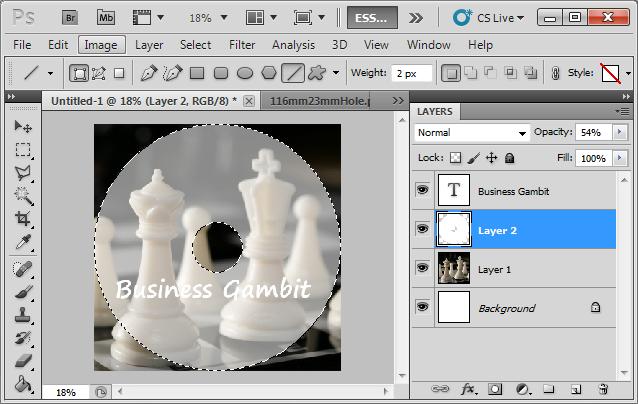
Step 9: Crop the picture
Choose the [Magic Wand Tool] from the [Tools] palette and point it to the white area of the template. This will marquee select the white area of the template.
Choose [Image] from the menu bar and then choose [Crop]. This will trim away the extra areas on the left and right sides picture.
Step 10: Clean up the unwanted area
With the white area of the template still selected, highlight the picture layer and then [Select] > [Inverse] from the menu bar. This will marquee select the areas of the picture other then the area of the template.
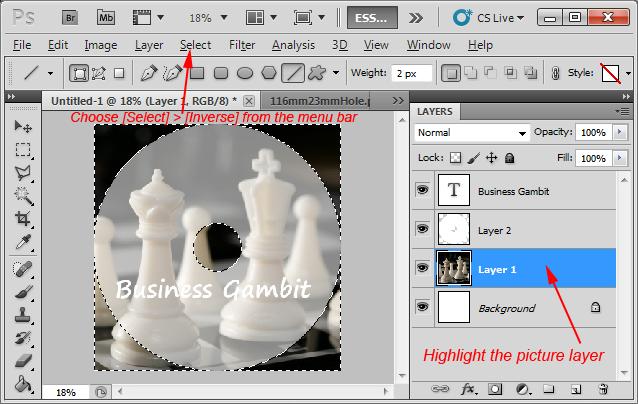
Press the [Delete] key on the keyboard to delete the unwanted areas.

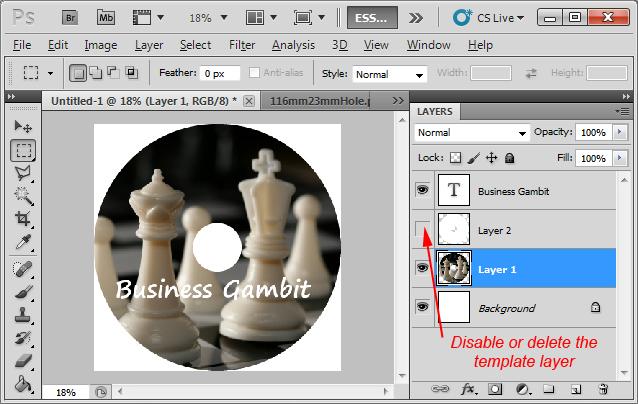
Step 11: Disable the template layer
Disable or delete the template layer and voila! Your CD label has been created.